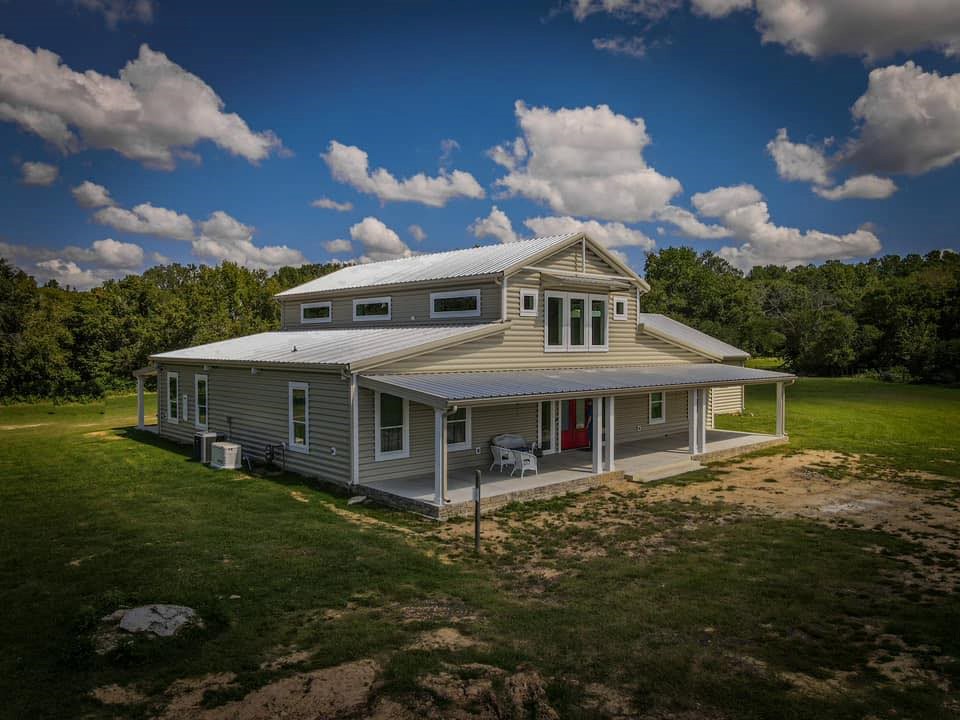
If you are searching for a mixture of cost effectiveness and unique design, you have likely stumbled upon terms like barndominium, barndo, and steel barn. These are terms used to describe a structure that combines the simple design of a barn with the comfortability of a condominium. Barndominiums are a unique take on a farm house, metal building, and luxury living in one structure.
Barndos have evolved from very simple structures to elaborately designed homes in just a few years. Originally popular in southern US states, barndos are a style of home construction designed to be simple, cost effective, and for the most part, low maintenance.
Barndominiums often begin as a metal building or a kit, and can often be erected more quickly than a normal brick and mortar home. Barndo designs often incorporate building techniques found in commercial construction, where low maintenance and space are prioritized over luxury.
The frame of a barndo can often be constructed quickly due to the use of machinery and steel components. In contrast to normal construction, barndominiums often employ steel posts and girders to erect the walls and roof, which are typically set with a crane. This process makes the framework of a barndo strong, and depending on the design, allows for more flexibility.
A typical 2,000-square-foot barndo can often be constructed in about 80%-85% of the time required for a similar wood frame home. This is due, in part, to the time saved in the initial phase of construction. As mentioned earlier, cranes and other machinery are common on a barndo construction site. By constructing the outer shell of the structure quickly, a barndo will often look near completion before the interior structure has barely begun.
A typical barndo project can be move-in ready within a few months, however, this will depend on the interior design elements of each plan. Barndominiums are known for their unique designs, so finding two alike is not as easy as it may seem.
Building a barndo uses both unique and traditional building techniques to create a structure that is often both beautiful and low maintenance. Here we will describe the steps needed to build a typical barndominium and offer a few tips to make your experience building a barndo a pleasant one.
Barndominiums can be secured to the ground in a number of ways, but here we will describe the most common approaches. Probably the most common method is via posts that are secured to the ground with concrete. Holes are dug using a post hole digger to the appropriate depth, which is determined by the frost line in the region where it is located. Cardboard forms are then placed in the hole and the posts are then concreted into the form. Steel is much stronger than wood, so this design often lends itself to open floor plans by reducing the need for bearing walls.
Monolithic concrete slabs are also very common if the ground is fairly flat. This type of pad is usually poured in two thicknesses. The perimeter of the structure will bear the majority of the total weight, so this area, known as the footing, can be up to three times as thick as the rest of the pad.
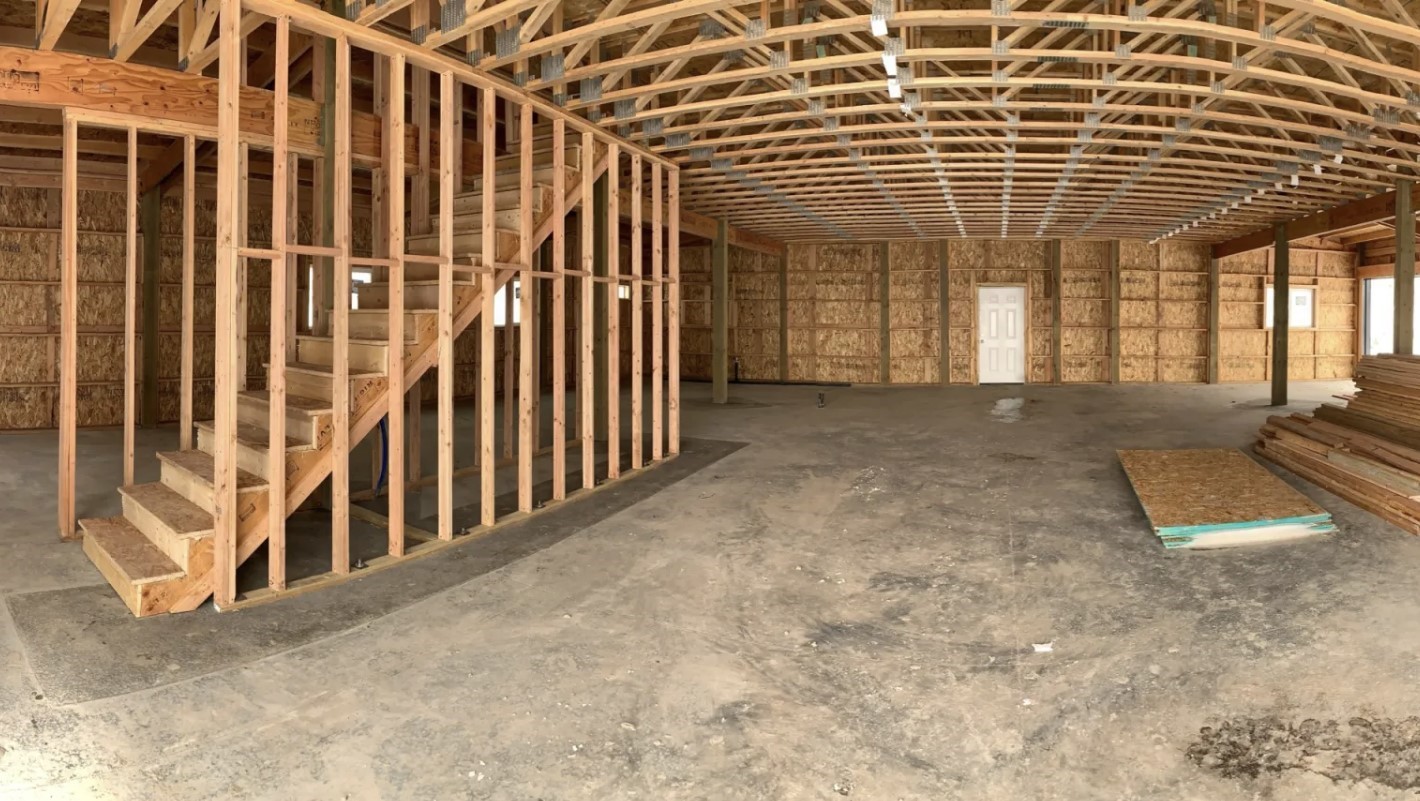
After the posts are set, the rest of the skeleton can be erected. This can be any combination of wood and metal framework, but a barndominium project will often employ steel beams, called girders. These are far too heavy to be set with manpower alone, so a crane is usually employed. The roof, walls, and foundation are tied together to form a very stable and durable structure.
The interior will usually be formed with wood lumber as this makes the installation of other components, such as insulation and drywall easier. Metal studs and tracks can be used as well, however this requires specialized knowledge and materials. Lumber is readily available, and craftsmen often have the most experience working with wood.
Often the nature of the framework will reduce or eliminate bearing walls. This often allows for more design flexibility within the structure. For example, walls that are only holding up themselves are known as partition walls. These walls essentially separate the rooms more than hold up the roof. Wooden beams, known as laminated veneer lumber or LVL, are often used to span distances between partition walls to allow foot traffic to move more freely.
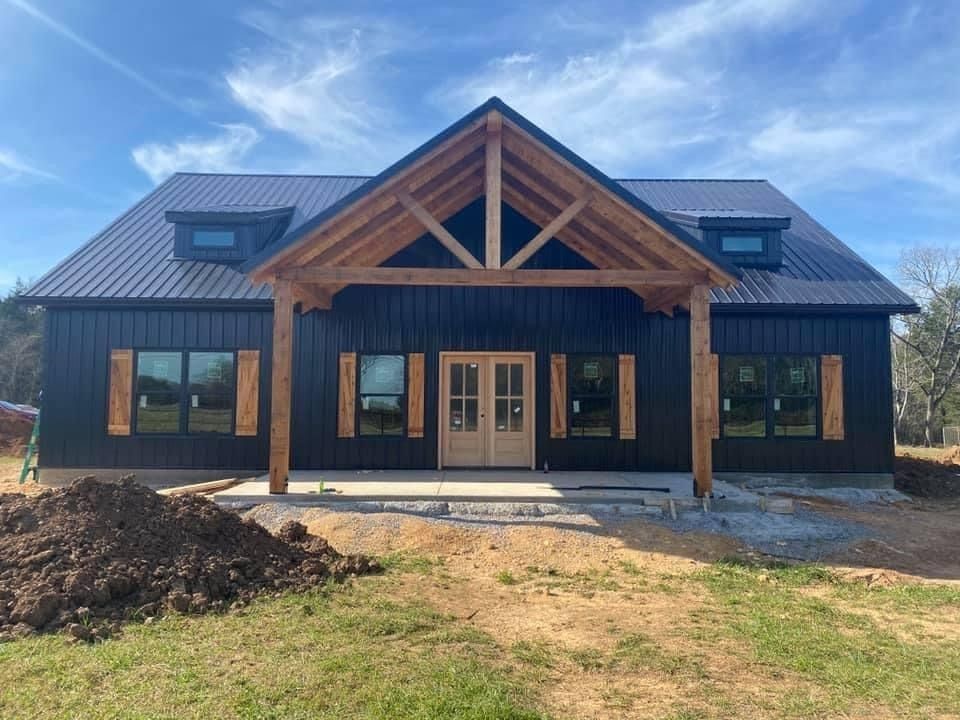
Barndominium roofs are also usually installed as part of the framing process. This helps keep the interior relatively dry during construction. As barndo roofs are often a barn style metal roof, they require the same tools and skillset as needed for the framing. Installing the metal panels at this stage is also usually less expensive since the labor and tools are already on site.
The same applies to weather shielding, such as aluminum gutters and fascia caps. Vinyl windows and vinyl clad wooden windows are also commonly used to enhance the low maintenance exterior.
This stage of a barndominium build will essentially mirror that of a traditionally built home. All of the interior systems will be installed at this stage. If you are contracting the project yourself, you will usually want to call your contractors in order. For example, many builders will install the plumbing next, as for drain pipes to work they must be installed following set rules.
By installing the plumbing at this stage, plenty of room is available for the required bends and angles. These days, most plumbers prefer to work with PEX, which is a plastic tubing designed to withstand extreme cold. PEX also comes in long spools, which greatly reduces the number of joints required. The reduced number of joints and flexibility of the tubing often mean water can flow from the water heater to a fixture in a single section, eliminating many potential leaks. Good builders will also install nail guards anywhere a nail or screw is long enough to penetrate a wire or pipe.
Electrical systems are usually next, because although wiring also follows a set of rules, the routing is more flexible. For example, it is much easier to route a wire around a pipe than it is to route a pipe around a wire. Good planning is crucial here, because certain wire gauges are required for the individual systems. For example, most homes use 15 amp circuits for the majority of the home. This is usually adequate for most rooms, however, it is important to plan the location of any component that may need a dedicated circuit, such as a jetted tub.
Some of the first barndominiums were built in the southern US where insulation is often optional. As barndos have become more popular, many have been built in colder regions, facilitating the need for insulation. Some local jurisdictions will have insulation building codes while others may not.
Professionals will usually recommend using the International Residential Code as a guide. Barndominium wall thickness, for example, will vary from design to design, but finished walls will generally be about 4 ½” thick, especially on upper floors. These are built with 2” x 4” studs, which allow for R-13 fiberglass batting or spray foam insulation. Lower floors may use 2” x 6” studs, because they are stronger and can be placed further apart. In these walls, the typical thickness will be about 6 ½”, allowing for R-19 fiberglass batting insulation.
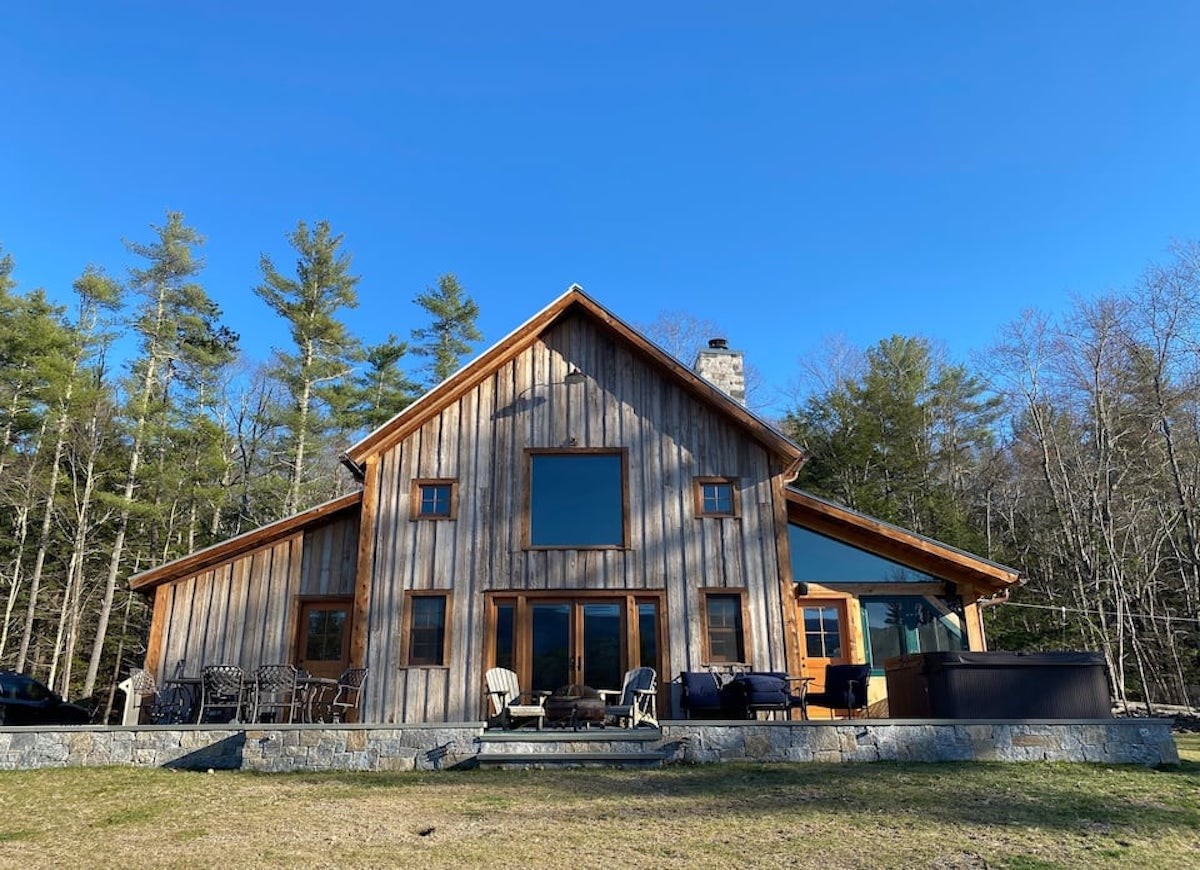
After all of the systems have been tested and passed inspection, wall covering is usually next. This is often drywall, but barndos tend to have a country feel. It is not uncommon for a barndo owner to incorporate tongue and groove paneling, stone work, or even rough sawn logs into the design. After the wall coverings are installed, professionals will usually paint next, using a sprayer. Sprayers make the job very fast, especially if multiple coats are needed. In most situations, flooring is installed last, followed by any trim.
Barndominiums tend to be unique structures, so nailing down an average cost can be tough. However, most barndos cost around $100.00 per square foot, which is often 10%-15% less than a comparable traditionally built home. This is due in part to the basic design and the use of cranes and other machinery. Here are a few tips to consider if you want to build your barndo on a budget: